Exercise Pitch Black 2016 is the largest air exercise over Australia this year and true to it’s name most of the flying is done at night over a massive area south of Darwin. At this year’s Exercise the Royal Australian Air Force really ramped up the media exposure allowing 20 photographers & videographers to cover the event. Now this presents two major challenges –
- How do you try and get a different shot to everyone else when everyone is standing in the same location with close to the same setup of camera gear ?
- How can you capture an image when half the flying is done at night time ?
Monday Night
Nikon Australia & their Nikon Professional Services (NPS) team decided it was my turn to try out their latest masterpiece the D5 DSLR and just so I couldn’t complain they matched it with the longest lens they make, the 800mm 5.6f VR ED. As Always I brought along my full setup of a Nikon D800 , 300mm 2.8f ED, 200-500mm 5.6f VR , 70-200mm 2.8f VR and just in case I got close to anything NPS lent me a 24-75mm 2.8f VR + Nikon MC-36 hand held remote.
The reviews & internet chat about just how crazy the D5 was and how far it can be pushed to get a cracker photo in low light needed to be tested. I knew the guys in the team would smash out crackers and have all the angles covered in daylight which freed me up to try and find a way to get something different at night or at least something in low light.
Monday night was my first chance to see if i could get anything decent using the best camera gear Nikon have made. We headed over to the Eastern side of the airport to one of the many spotters spots beside the Careflight hangar and it was great to see so many locals already there to enjoy the action with many having their own cameras ready to capture the action as well. I have shot in well lit areas at night before but had only had one chance before this at night take offs which i wasn’t to happy with the results I got. I started with the most basic settings in manual working off 5.6f as the most open the Nikkor 800mm would go to let light in, a shutter speed between 1/320th to 1/500th as the length and weight of the lens was going to make slow shutters speeds for panning very hard. Using these basic settings I mixed up the ISO settings as much as possible between each launch and only after a few goes I was getting some good results but like all photos what might look good on the back viewer screen doesn’t mean it will be any good until I see it on a good monitor. From our position the aircraft were taking off left to right and getting into to air close to in front of us at a distance of about 530m. There are some nice tower lights on the base side but every aircraft rotated at a different spot so lining up any background light to help the aircraft’s profile stand out was going to be lucky.
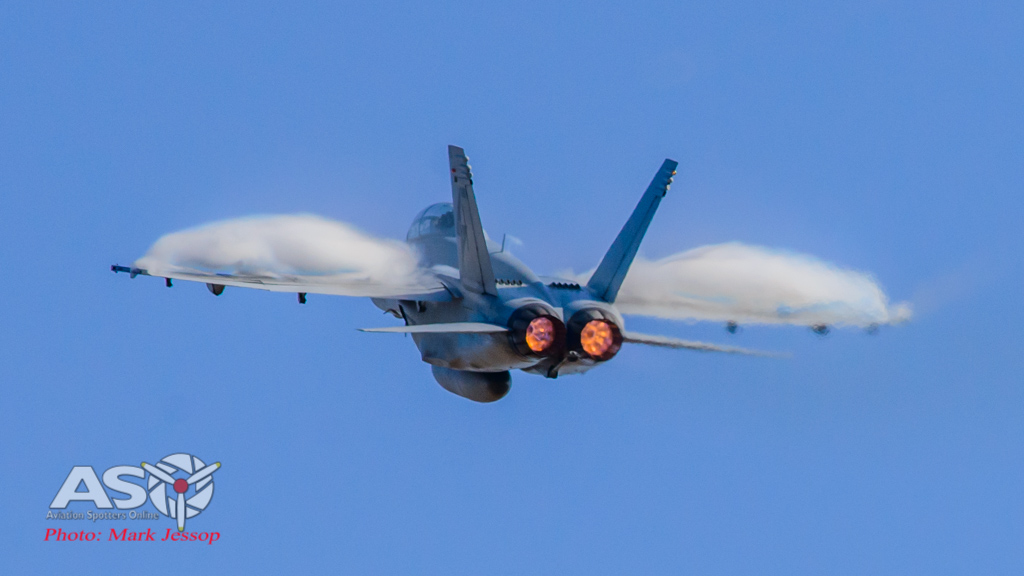
As it turned out the ability of the Nikon D5 and Nikkor 800m 5.6f VR shocked me in just what was possible as I was getting crisp shots at shutter speeds down to 1/125th which I think is awesome as I was hand holding the camera.
One of the best things of so many jets going out is that is that once you try and get over just how awesome the launch was it’s not long before they all start heading back to land. We moved to the South Eastern end on the perimeter fence for what would start as side on shots but would end up straight underneath shots. From a few km’s out a line of landing lights appear but waiting till they were close enough to get the auto focus to lock on the front wheel light before trying to get a shot. Between each jet I found myself walking closer to the center line until I was straight underneath the aircraft as they landed. The strongest light was in the wheel bay and I just wanted to see if it was possible to get a head on shot in virtually no light.
Something which had I had not experienced before was to stand right under a F-15 as it landed, with so much going on as the space between each aircraft was only a minute or two at best and trying to keep up with taking photos and what settings to use the first F-15 came over and about 5-10 seconds after it passed this crazy sound of something like a massive ribbon or streamer of Air from the wingtips came down right on top of us. I had heard this sound once or twice but it sounded like a whip of air hitting the ground and the first few times it surprises you, but over the next few nights this air would really play havoc with what I was trying to do.
I was loving being so close even if I didn’t get a photo but, on one of the Super Hornets passes I didn’t chase it but kept looking up and saw how clear the sky was and just how many stars I could see. Now how do I get stars and a jet to work in one frame and in one shot?
Tuesday Night
I was pretty happy with Monday’s results and was thinking of just how many different locations our trusty local team member Sid Mitchell could take us too. Sid loved the challenge and took us to a nice spot on the base side south end. Tonight’s launches would come straight at us but to make the challenge harder most aircraft would have the after burner off by the time they got close to us but we would just enjoy the sound and view of 40+ jets taking off and if I got a photo it would be a bonus. As we expected we were too far to really get any photos but the USAF F-16’s keep their Afterburner on for longer than the rest and I still got some shots but even using the 800mm sometimes you just have to be closer.
Once all the aircraft had launched we headed back to the center line at the South end and setup up for the returns. Sid brought along his tripod, so I set the Nikon D800 and 24-70mm 2.8f VR with the Nikon MC-36 hand held remote plugged in. This remote is a great little unit that makes it very easy to program different intervals of shutter release which I use a lot when I do time lapse stars at home. I worked off starting with the settings I use at home for doing stars which is Camera mode: manual, ISO: 5000, 4.0f and test exposure of 15 seconds using bulb mode. I never go long then 25 seconds as then the stars start to move in the frame. Since I was still taking photos with the Nikon D5 but this time with the 300mm 2.8f Peter stepped up to fire the remote and help see if it was possible to get a photo I was thinking about.
This is the first frame we tried to get an aircraft in the frame, we judged the exposure by how bright we thought the lights on the aircraft where and the distance out.
We could see we were getting a result but just tried to mix up the settings to see what worked best as we didn’t have much time between each aircraft but we knew it was working. One of the last star photos for the night was the RAAF C-130J-30 Hercules which was very well lit up and the problem Peter, Sid and I couldn’t figure out was how do we show the aircraft as we could get the stars and we could get the movement from the lights on the aircraft but we couldn’t see the aircraft.
Something that has to be mentioned is that with so much happening, twice I forgot to remove the lens cap! Lets just say it shouldn’t happen again but time will tell.
While the action with the stars was going on I was still trying to get some night shots using the 300mm 2.8f which lets in more light than the 800mm 5.6f and still is one of my all time favorite lenses.
Wednesday Night
We headed back to our spot on the base side south eastern end to get the take offs as this time they were launching away from us to the north. This spot is 1130m from the launch spot which is still a great distance to try and get a photo but you work with what you have. I really didn’t know if I would get anything that could be used at this distance but it’s worth a try.
While most of the action was takeoffs there were a few arrivals that came in like this RAAF AP-3C Orion. I found all of the military aircraft hard to get a focus lock on but the easiest way is to focus on the front wheel light.
Once all the launches were done we moved back to the same spot straight under the center line with a new plan of attack to see if we could get any more of the aircraft profile in the picture. Another element just to make it harder was the moon was becoming more brighter and higher in the sky which would lighten the sky darkness meaning shorter exposures. Our plan tonight was to try and fire two other cameras at the same time to use their flash to lit up the profile of the aircraft at the end of the exposure. Leigh and Peter used their DSLR’s to add flash to the shot and it was awesome to just see the teamwork between everyone in trying to get this photo to work. Sid was making sure us non locals didn’t dehydrate by keeping up the level of cold fluids at all times. While all this was going on I was still trying to get a better head on shot of each aircraft. Something which was really starting to stand out in the photos was the amount of dust in the air from all the down wash off each aircraft. Once the RSAF F-15SG’s had flown over it would take a few minutes for most of the dust particles to clear.
As you can see we started getting a result close to what I first had in mind but it wasn’t what I wanted. I was very happy with all the settings but just couldn’t get enough flash on the bottom of the aircraft and to throw more chaos to the problem I left the lens cap on once, Peter did it twice and Leigh did it once ! You would think we would learn but we had made progress and with only one more night it was time to get it right.
Thursday Night
We had a massive day on base Thursday but I made time to speak to my number one man about anything to do with taking photos , Jeremy from NPS in Sydney. I had sent Jeremy a few photos during the week to show him how I was going but tonight it had to happen and it had to be right as I wouldn’t get another chance to get the shot I was chasing. I don’t use a flash that often as I prefer to just use the light on offer and make something happen but very quick it was clear that I only needed one flash unit the SB910 and something I hadn’t used before on the camera the “rear sync” setting. It’s just not something I have ever used so I just didn’t know about it , while I was on base some “magic” worked and I received a call from the local Camera House Owner Russell Brown who said I should come in before he closed as he had what I needed.
It was very good to hear that business was going great for Russell this week as everyone was coming in asking how can I get a photo of the night time action ? After a quick read on how to set the flash unit up I was looking forward to this last chance because the team had put a lot into the idea and it was awesome just to see how different photographers think and what they have used in the past to get the result they were chasing.
Tonight I would only focus on getting this star photo as it was time to get the results. We all joked about the lens cap and how we had left it on enough but as luck would have it I did it twice ! It was that silly I decided to use a hat so there was no way I could forget it was on there. All that aside the only change from all the other nights was a very powerful flash unit set at half the distance to the aircraft and “rear sync” setting for the Nikon D800 camera flash. We also made sure every time we used the flash the aircraft was straight above us or past us so the flash wouldn’t affect the pilots on approach. The results on the first shot let me know the hard work had paid off.
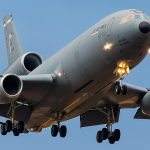
RAAF KC-30A Camera: Nikon D800, ISO: 5000, Shutter: 7,8 seconds, 4.5f, 24mm
The flash made the shot what I wanted but also added another major problem in that all the dust in the air stands out when the flash goes off. It is Darwin in the dry season but for our first week trying to get a shot we now have something to work with. I can not thank the team enough for putting up with me while I was trying to figure out just how to make the shot happen , to Russell from Darwin Camera House, Sandisk Australia and to Jeremy and the Nikon NPS team back in Sydney. These photos show just what a team can achieve when everyone is working together . I hope by showing the different settings everyone can have a go at trying to get some of these hard shots that most think can’t be made. If any has any questions please feel free to ask- Mark Jessop


Great photos and a great article, Mark. Thanks for including the camera settings, etc, they really are a help when setting up my own camera.
Hi Trevor, thanks for the great comments. We will be looking at adding more information on how we take our photos and what settings we use. We hope we can help everyone take better photos and enjoy the time they put into Aviation Photography.- Mark
Thanks Mark. Wishing you happy future photography.